
I have written repeatedly of my love of greens. They’re not only delicious and healthful, they’re also incredibly forgiving to grow (and neglect) in the garden. There are greens for practically every season, and flavor profiles to fit every palate—from mild and sweet to sour to pungent to bracingly bitter and any combination thereof. Their textures can vary from crisp/crunchy to silken to fibrous to slippery (mucilaginous) to leathery and more, depending on type of leaf and cooking method. Every culture has its favorites, and not surprisingly, entire cookbooks have been written about lowly, lovely greens!
At this time of year when greens are so plentiful, I like to braise and freeze a good quantity of my home-grown greens to have in the depths of winter—and greens, after braising, take very well to freezing. If you would like to braise and freeze your own, just follow the recipe below up to the point where you “allow them to cool.” That is where you would freeze them.
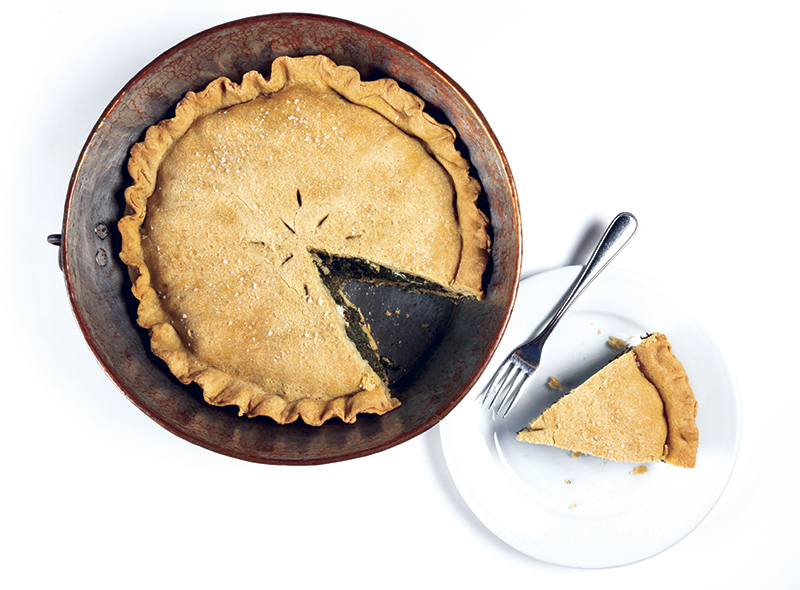
Regardless of whether you grow your own or freeze them for winter, I hope you try the following recipe. It is a simple pie filled with braised greens that can be adapted in countless ways. Even green-averse children (and adults) might be willing to try—and love—something you could call a double-crusted stuffed pizza.

Braised Greens in a Crust
Every cuisine on the planet has a variation on this dish, but if I had to give this version a place of origin, I would say generic Mediterranean. You could use any type of pastry crust, like filo/phyllo, puff pastry, pizza dough (I use that most often), American pie crust, or hot-water pastry. This crust is adapted from my mentor, Lidia Bastianich, and it originates around Rome and south to Naples—I had an identical one in a trattoria in Rome just last fall. It contains yeast and semolina flour, which contribute a flavorful and slightly crumbly texture. As for the greens, I love to use those with bitter notes, like mustards, chicories, and escarole. But spinach, Swiss chard, and collards are equally delicious and perhaps a bit more approachable for most people. And don’t forget the wild greens, such as nettles, maiden’s tears, dandelions, and poke, if you have access to them—they can be extremely nutritious and free.
For the crust—and as I mentioned you can use any type of crust you like/have to hand—in a food processor, combine 1 cup tepid water, 2 teaspoons active dry yeast (I’m assuming your yeast is alive and well), and a heaping teaspoon of honey, and let them sit together and come to life for a few minutes while you gather the rest of you ingredients: 1½ cups of all-purpose flour, 1½ cups semolina flour, 1 teaspoon fine salt (see In Your Pantry about salt), and ¼ cup extra-virgin olive oil. When you see the yeast dissolving in the water, perhaps looking a little foamy, add the olive oil, flours, and salt. Put the top on the food processor and pulse the mixture a few times to combine all the ingredients (you could also mix this by hand, or mix it in a standing mixer). In long pulses, continue kneading the dough until it becomes much more smooth and forms a ball that races around the processor bowl cleaning the sides. It will never be completely smooth because of the semolina. If the dough is very sticky and won’t form a ball, add a tablespoon of flour and continue pulsing until the dough comes together. If the dough is too dry and crumbly to form a ball, add a tablespoon of water (or more) until it comes together. Transfer the ball of dough to a lightly oiled bowl and cover, allowing it to rise for about an hour while you prepare the greens.
For the greens, it will take several large bunches depending on the variety. Some greens, like spinach and mustards, lose a considerable portion of their volume when cooked. Swiss chard and collards are more sturdy and wilt considerably less. Wash them thoroughly to remove any grit, and tear off any tough stems (like those of large kale and chard). Drain the leaves briefly (a little water clinging to the leaves will actually aid the wilting process) and chop them into 1-inch strips. In a large skillet or dutch oven, sauté 5 or 6 sliced cloves of garlic, adding a big pinch of crushed red pepper flakes or other spicy pepper just as the garlic begins to turn golden. Quickly, before the garlic burns, add a big handful of the chopped greens (watch out for the spatter of wet greens hitting hot oil), stir, and cover the pot to begin the steaming/wilting process of the greens. After about a minute, uncover the pot and season with salt. Add more greens, stirring, and again cover the pot, continuing in this fashion until all of your greens have been added to the pot. For delicate greens like spinach, this will take only a few minutes, 5 at most. The sturdy greens could take up to 30 minutes to completely break down and become tender. For the longer-cooking greens, be sure to monitor the liquid in the pot to be sure the greens don’t burn. In most cases, the leaves will release enough water that you don’t have to add any, but if the pot does become dry, add a few tablespoons of water as necessary and/or turn down the heat. When the greens have finished cooking and the liquid in the pot has mostly evaporated, remove the greens from the heat and allow them to cool while you prepare your baking dish by lightly coating it with oil or butter. Divide the pastry dough into two pieces and allow it to rise briefly while you finish the filling (the dough can be allowed to rise a second time or even refrigerated and allowed to rise very slowly overnight for a more complex flavor).
Transfer the cooked greens to a large bowl, squeezing out any excess liquid. When writing this recipe, the weight of my cooked greens was about one and a half pounds, but if you don’t have quite that much, you will be okay. To the greens, add one cup of grated hard cheese, such as Parmigiano or aged cheddar, and about the same amount of a melty cheese like mozzarella (smoked would be nice), fresh goat cheese, or gruyere.* Mix thoroughly, taste the filling and adjust seasoning as necessary. Roll one of the pieces of dough slightly larger than the size of the baking dish you are using. Lay it over the dish and set it into place, stretching a little if needed to fully line the pan. Put all of the filling into the pan and roll out the second piece of pastry so it is just a little larger than the top of the baking dish. Set it into place, crimp the edges of both pieces of pastry together to seal them, and cut a few small slits in the surface of the crust to allow steam to escape. Brush the top of the crust with oil and sprinkle lightly with salt. Place the dish in a preheated 375F oven and bake for 40-45 minutes until the top is a lovely golden brown. Remove the pan to a rack to cool for half an hour before cutting. Serve the tart warm or at room temperature. Although lovely served alone, a bowl of soup or some paper-thin slices of good cured meats or fish would be tasty allies, as would a crisp chilled sauvignon blanc.
*Notes on filling variations: One of my favorite additions (which will appease the carnivores in your household) is the addition of crumbled cooked Italian fennel sausage (like our local Scimeca’s). Lardons of bacon or other smoked meat (or cheese) would be tasty with particularly bitter varieties of greens. Hard-boiled eggs, halved or quartered and distributed throughout the filling, would be a beautiful and protein-packed enhancement. Olive or capers, feta cheese, and herbs would also make a flavorful impact if added with a judicious hand.

In the past two decades or so, salt has become something of a weapon in culinary circles, an ingredient to further stratify an already complex cultural culinary hierarchy. But really, it’s just sodium chloride (primarily), a chemical requirement of human bodies, a natural flavor enhancer and another opportunity to enhance the dining experience. Don’t feel overwhelmed by the salt choices presented to you. Think of them as opportunities to subtly elevate something basic. And if salt is really your thing, read Salt: A World History by Mark Kurlansky. You’ll never think about salt the same way. The following are some ways to think about salt.

The Starting Point—Kosher Salt The name of this salt derives from the size of crystals, which, because they are larger than common table salt, are better at drawing blood out of meat in the koshering process (large crystals take longer to dissolve and facilitate osmosis). Kosher salt is the standard salt in most restaurant kitchens, but it must be noted that there are two brands that are most commonly used, Morton and Diamond Crystal. They have very different characteristics and perceived “saltiness” depending on how they are used. Switch one for the other in a restaurant and the recipes will all go a little wonky. Diamond Crystal has more flaky shaped and lighter crystals than Morton’s, whose crystals are dense and seem “saltier.” Many cookbooks and recipes often specify which type of salt to use due to the difference in “saltiness,” so always use taste as your ultimate guide. Common table salt (usually Morton, the dark blue cylinder we all know) has much finer crystals plus iodine (for common nutrient deficiencies) and the addition of anti-caking agents to keep the fine crystals from clumping in the can or salt shaker.
Size and Physics A great deal of the perceived “saltiness” of various salts comes from the size of the crystal. A larger crystal gives a more intense salt experience, a burst of flavor, and as mentioned with kosher salt, takes longer to dissolve, which makes it superior for dry-brining meats and drawing water out of foods over an extended period of time. All salt is sea salt and was derived from evaporated ocean water (even mined salt was evaporated from oceans—just thousands/millions of years ago). Sea salts vary depending on the location of harvest and harvest method used (most of them are produced through evaporation of water from sea water, leaving behind just the salt and various minerals and residues which contribute to different shades and colors of different sea salts). Fine crystals dissolve more rapidly and stick to foods better than larger crystals, and are best applied when foods are still warm so they stick. Himalayan pink sea salt is mined from one specific region in Pakistan. Its color is due to trace minerals, iron being the primary contributor to the pink hues. It has many purported health benefits, but that just may be good marketing. Go to any TJ Maxx or Home Goods, and you are sure to find a selection of pink sea salt.

Texture Aside from crystal size, texture—in this case the super crunchy texture of big flake salt—is one of the most obvious differences in type of salt. Maldon, a British variety of big flake salt, is readily available and is wonderful for sprinkling on baked goods and on foods right before serving—say, right after slicing a big piece of roast meat, or sprinkled atop raw fish immediately before it is consumed. Oysters love a bit of Fleur de Sel or other briny, gray flaky salt harvested off the surface of the ocean or from saline ponds.
Flavor and Memory Whenever you travel keep an eye out for local salts. Salt is a wonderful edible souvenir and vehicle for flavor. It can be as simple as a reference to a location that brings back memories, or infused with different herbs and spices evocative of specific places. Smoked salts and truffle-infused salts deliver complex flavor in just a pinch. And as a souvenir or gift, they have the added bonus of being simple to pack.